Authentic Israeli Pita Bread Recipe

A Taste of Israel in Every Bite
Learn how to make traditional Israeli pita bread with this detailed recipe. Perfect for sandwiches or as a side to your favorite dishes.
Image illustrating:Authentic Israeli Pita Bread Recipe
1
David Pliner
Culinary & Israeli Heritage Enthusiast
Discover the rich history and delightful taste of Israeli pita with this authentic recipe. Perfect for baking enthusiasts and those who love Israeli cuisine.

Health Benefits

  • Pita is a low-fat bread option, making it a healthier choice for sandwiches.
  • Rich in carbohydrates, pita provides energy for daily activities.
  • Contains essential minerals like iron and magnesium.

Ingredients

All-purpose flour
3 cups
Warm water
1 cup
Active dry yeast
1 tablespoon
Salt
1 teaspoon
Olive oil
2 tablespoons
Sugar
1 teaspoon

Chef's Tips for Perfect Pita

For the best results, use a baking stone in your oven to mimic the traditional tabun oven. This helps achieve the perfect puff and texture. Also, ensure your oven is preheated to a high temperature before baking.

Instructions

  • 1
    1
    Prepare the Dough
    In a large bowl, combine warm water, yeast, and sugar. Let it sit for 5 minutes until frothy. Add flour, salt, and olive oil. Mix until a dough forms.
  • 2
    2
    Knead the Dough
    Transfer the dough to a floured surface and knead for about 10 minutes until smooth and elastic. Place in a greased bowl, cover, and let rise for 1 hour or until doubled in size.
  • 3
    3
    Shape the Pitas
    Punch down the dough and divide it into 8 equal pieces. Roll each piece into a ball and then flatten into a disc about 1/4 inch thick.
  • 4
    4
    Preheat the Oven
    Place a baking stone or an inverted baking sheet in the oven and preheat to 475°F (245°C).
  • 5
    5
    Bake the Pitas
    Place the dough discs on the hot baking stone and bake for 3-5 minutes until puffed and lightly browned. Remove from the oven and cover with a clean towel to keep soft.
  • 6
    6
    Serve and Enjoy
    Serve the pita warm with your favorite dips or fillings. Enjoy the authentic taste of Israeli pita at home.

The Journey of Israeli Pita

Pita bread has been a staple in Middle Eastern cuisine for centuries.

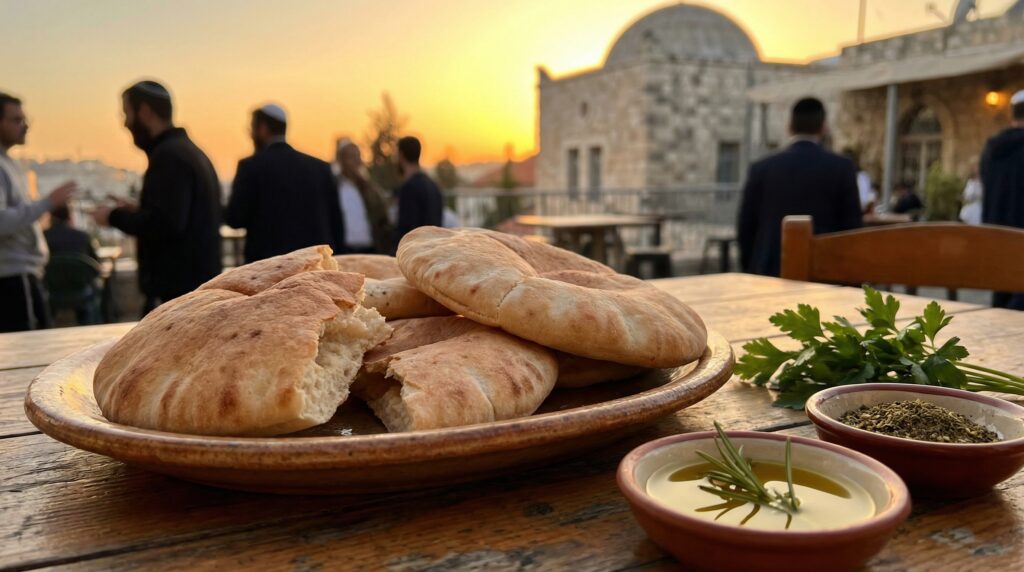
The origins of pita bread can be traced back to ancient times, where it was a fundamental part of the diet in the Middle East. Its simple ingredients and versatile nature made it a popular choice among various cultures.
In Israel, pita has evolved into a beloved bread, often used to scoop up hummus or filled with falafel. Its pocket-like structure makes it perfect for stuffing with a variety of fillings, reflecting the diverse culinary influences in the region.
The process of making pita involves baking at high temperatures, which causes the dough to puff up and form a pocket. This unique characteristic is what sets pita apart from other types of bread and makes it a favorite in many households.

Israeli pita is known for its soft texture and slightly chewy consistency.

The traditional method of baking pita in a tabun oven gives it a distinct flavor and texture. However, modern recipes have adapted to using conventional ovens, making it accessible for home bakers around the world.
Pita’s versatility is one of its greatest strengths. It can be used as a wrap, a scoop, or even as a base for toppings, similar to a pizza. This adaptability has helped it maintain its popularity across different cultures and cuisines.
In recent years, pita has gained international recognition, with many chefs and home cooks experimenting with various flavors and ingredients to create unique versions of this classic bread.

Making pita at home allows for customization and experimentation.

By adjusting the ingredients and baking techniques, home bakers can create a pita that suits their personal taste preferences. Whether you prefer a thicker, softer bread or a thinner, crispier version, the possibilities are endless.
The cultural significance of pita in Israeli cuisine cannot be overstated. It is more than just a bread; it is a symbol of hospitality and community, often shared among family and friends during meals.
As you embark on your pita-making journey, remember that each piece of bread carries with it a rich history and tradition. Enjoy the process and the delicious results that come with it.

Related Recipes

FAQ

Can I use whole wheat flour instead of white flour?
Yes, you can use whole wheat flour, but the texture will be denser.
How should I store leftover pita?
Store pita in an airtight container for up to 3 days or freeze for longer storage.
What should the dough consistency be like?
The dough should be soft and slightly sticky, but not too wet.